
Rigging the squash & stretch ball in blender#
0. Foreword#
In this article you’ll learn:
- How to rig a ball in blender
- How to create armatures and move them to snap bones in place
- How to use Bone Widget to create controls
- How to keep your rig and project file clean
- Basics of preparing rig for usage by other people
1. Preparation#
For our blender ball rig, we’re start by downloading the project files and Bone Widget.
Heads up: As of the publication day, blender doesn’t use riging nodes, that’s why we’ll need to do little hacking in the controllers hierarchy, that I’ll try to avoid later in the series, I’ll let you know where and why it happens.
2. Armature and Skinning#
After opening the .blend file, your project should resemble this: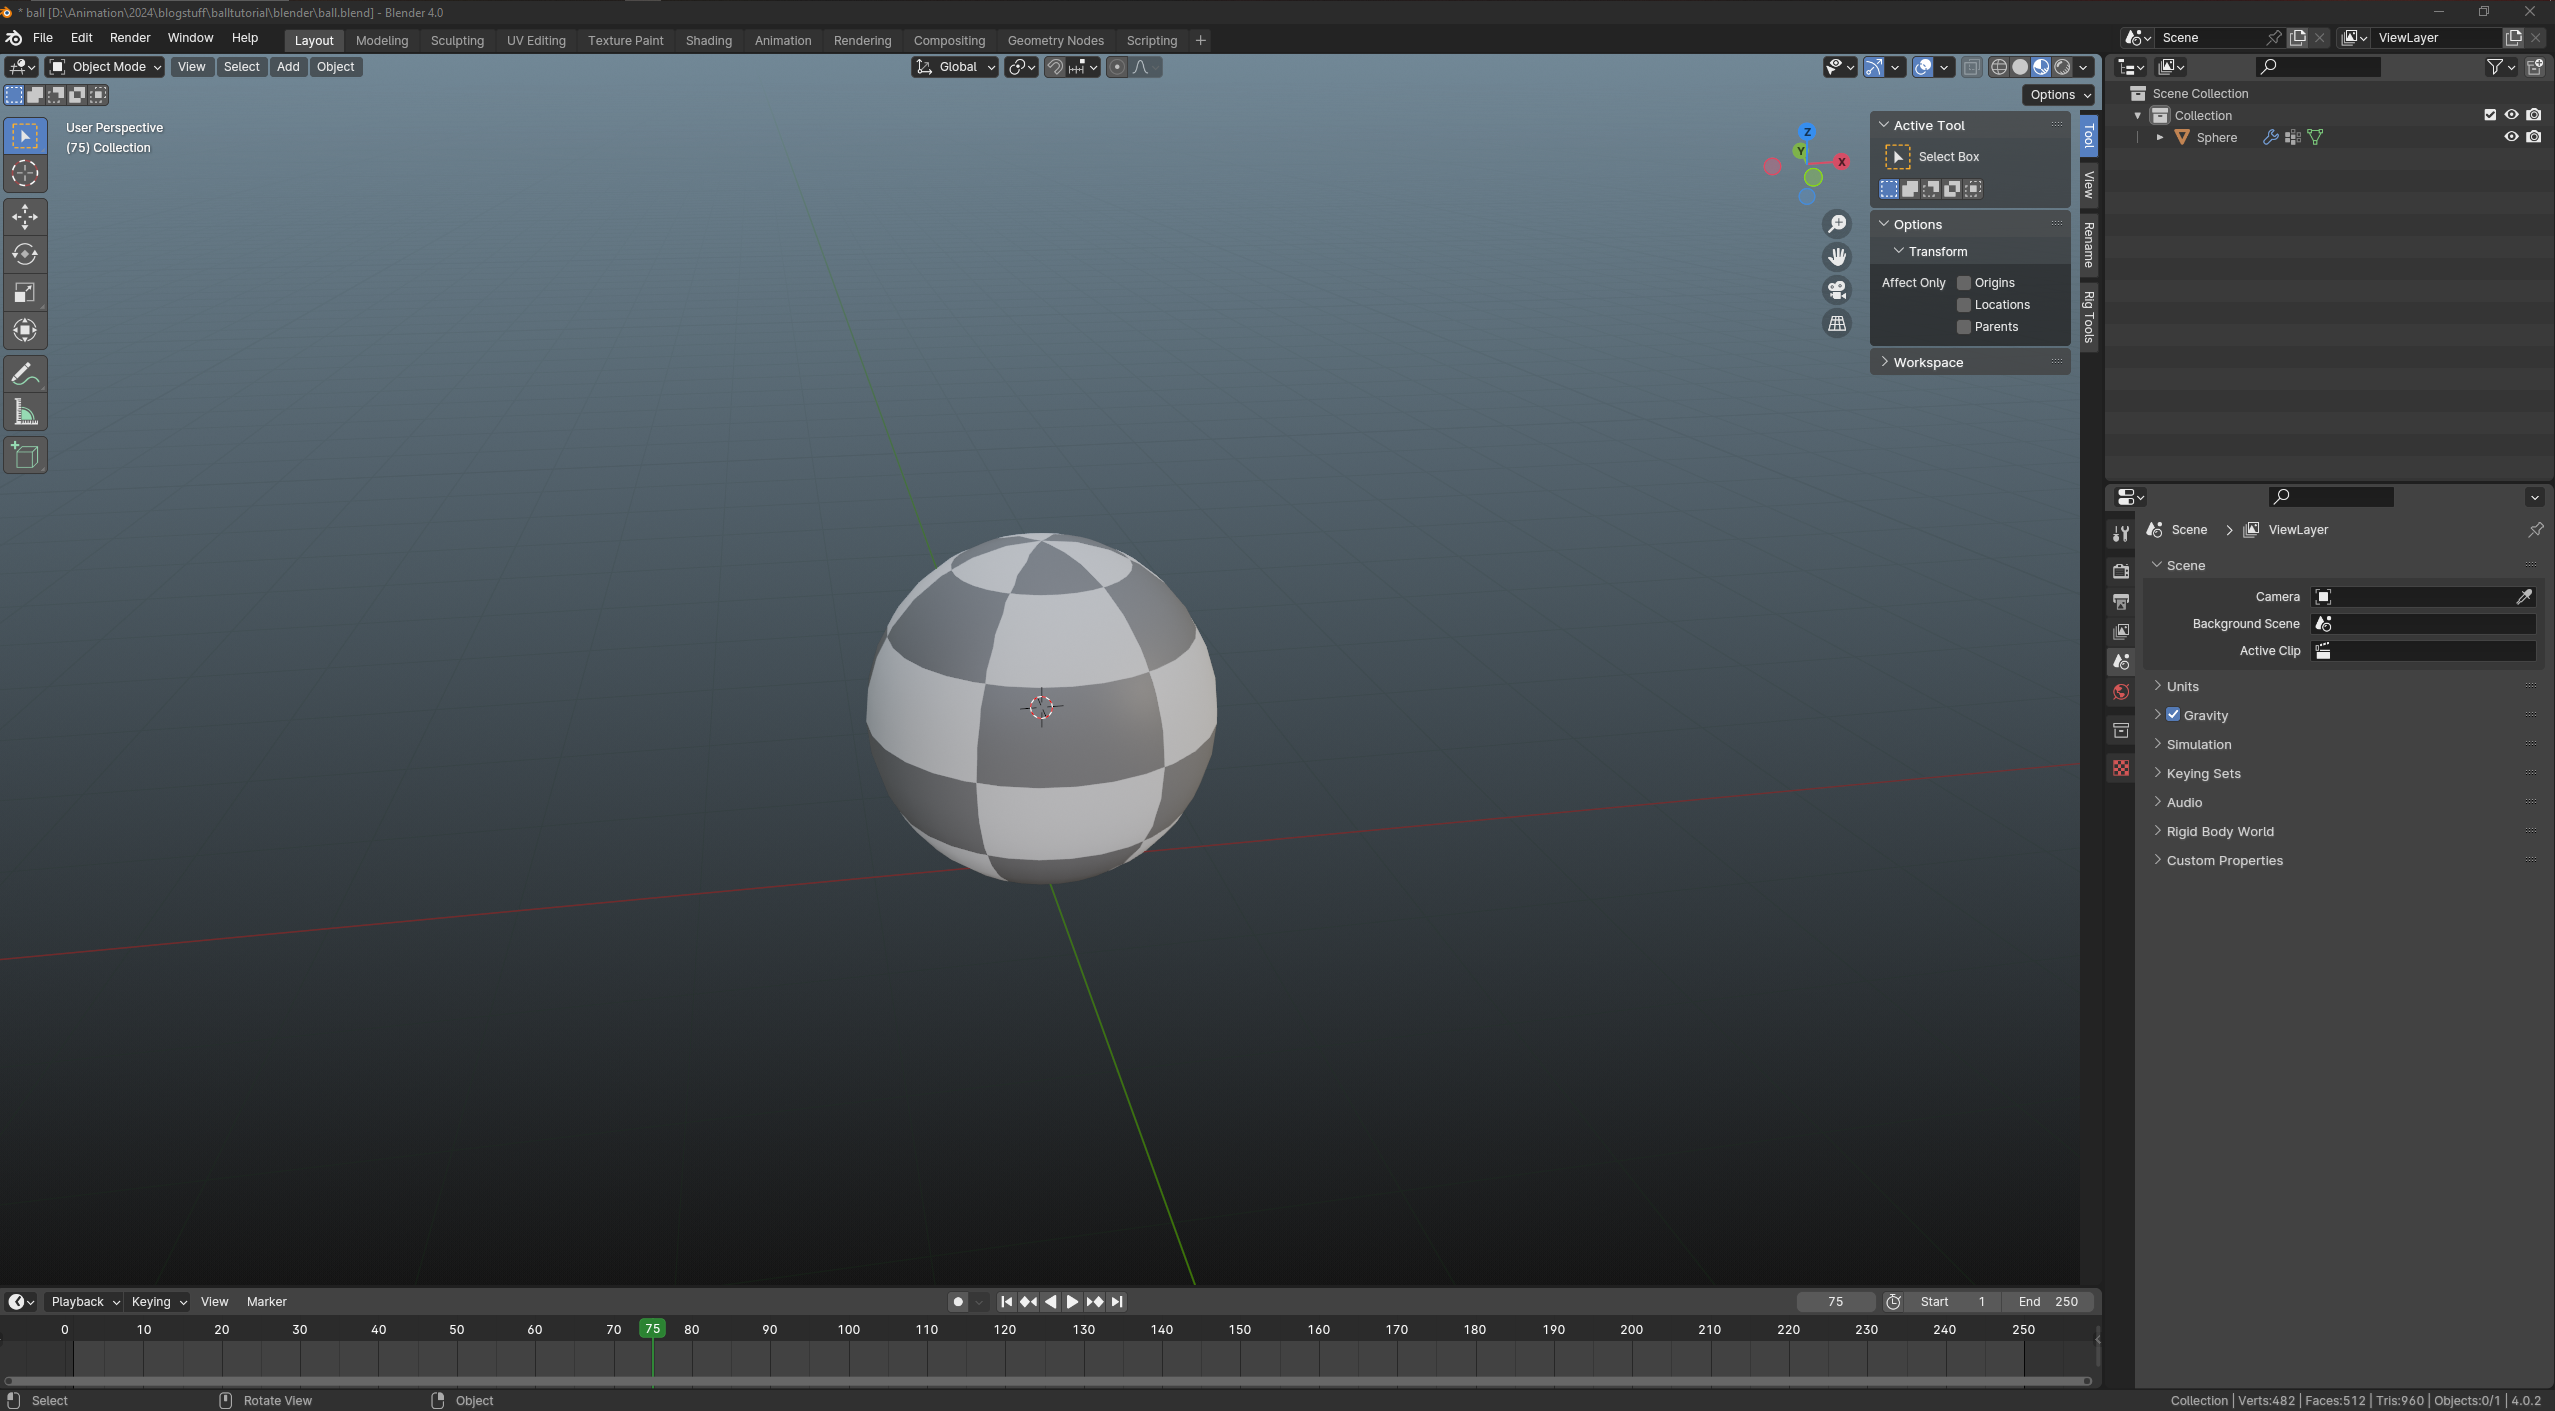
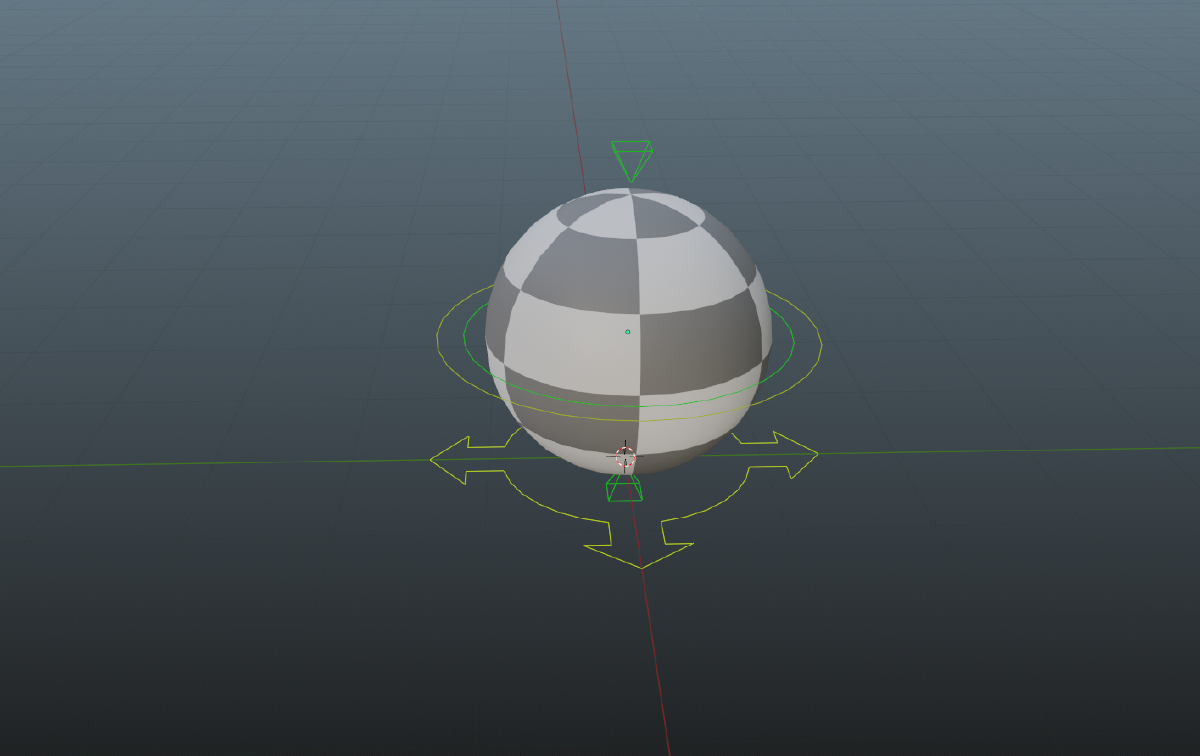
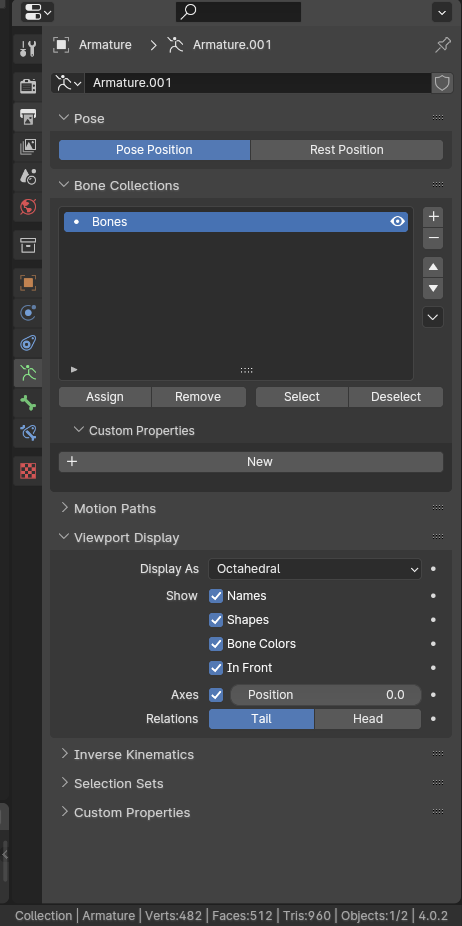
To kick things off, let’s create armature in the correct axis. Hit NUM3 to align the camera in ortographic mode. Our left side will become the front of the model and our right will become the back. We’ll use that knowledge, to create the root bone. Now, add the Armature by pressing SHIFT + A and selecting Armature from the drop-down menu. It will be generated in the middle of the ball. As it’s inside the mesh, you might not see it. Head over to the right side - to the Properties tab. Select Armature Data > Viewport Display and enable:
- Names - This option shows bone names, it’ll help us in defining bones on screen, without having to look all the time at the outliner.
- Shapes - It’ll let us look at controls later
- Bone Colors - It’ll let us change controller colors later
- In Front - It’ll render bones always in front, super useful for aligning stuff.
- Axes - It’s important for understanding our rotations.
Once you’ve selected the armature, switch to Edit Mode by pressing CTRL+TAB.
To streamline the workflow, head over to Preferences > Keymap and enable “Tab for Pie Menu” option. This modification allows user to switch modes by pressing TAB key. Moving forward, I’ll be using it.
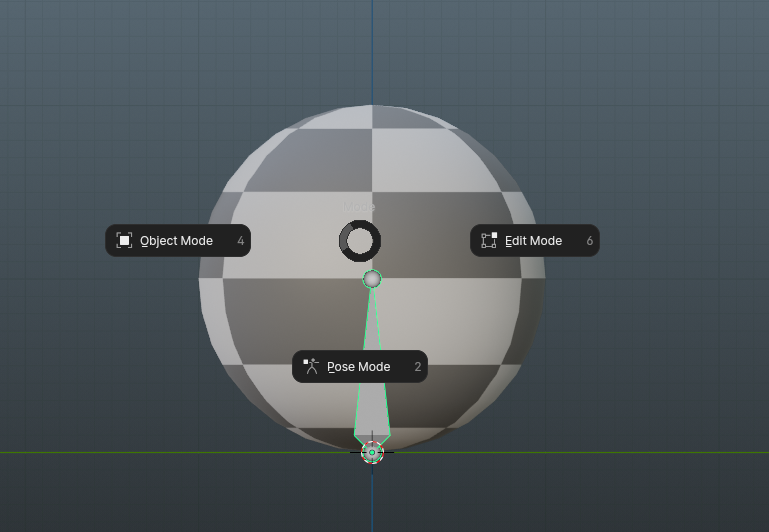
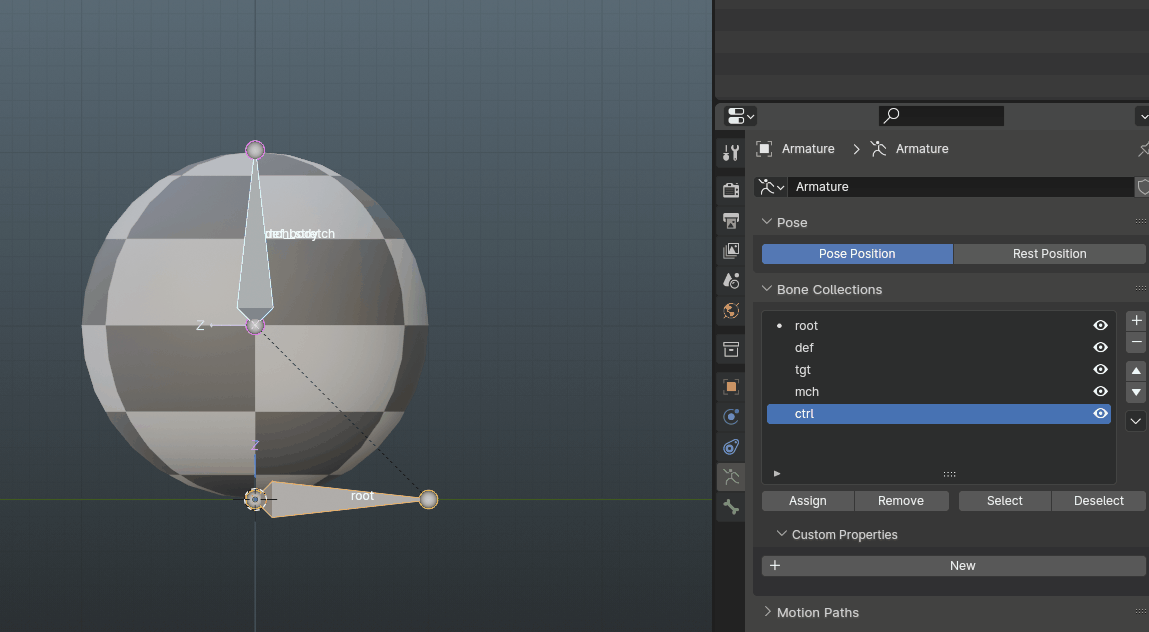
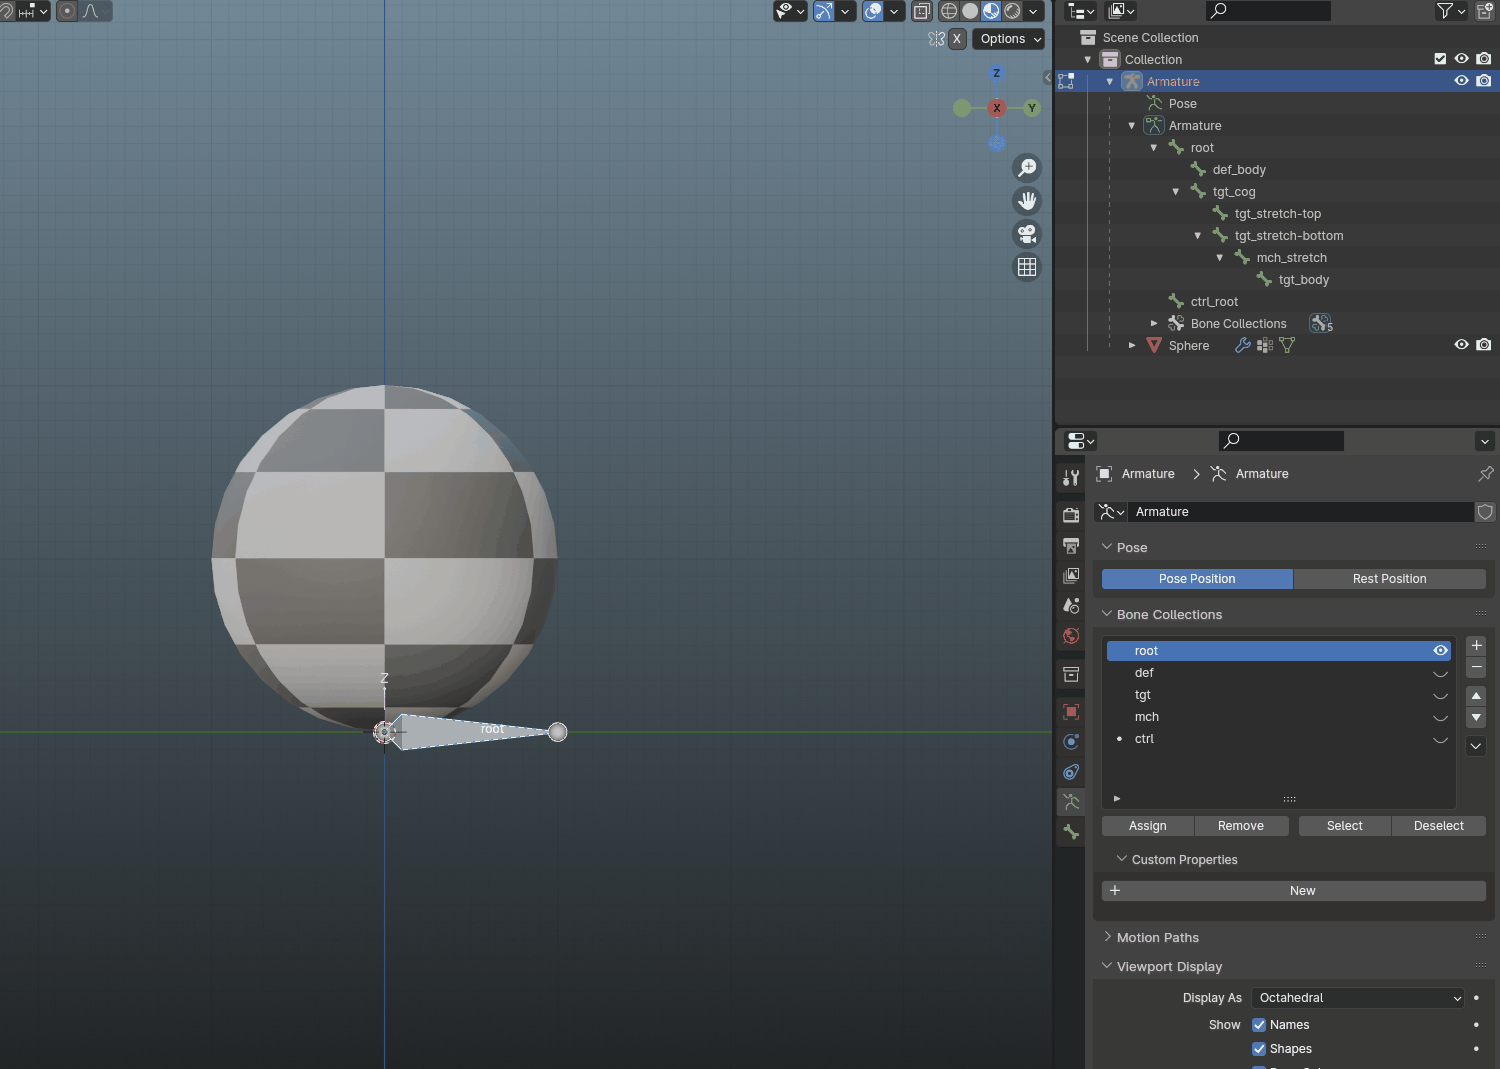
While in Edit Mode, select the bone and rename it to “root” by pressing F2 to enable fast renaming, confirm with ENTER. As mentioned in the past article, the root is always placed in world origin, and that’s exactly where we will place ours.
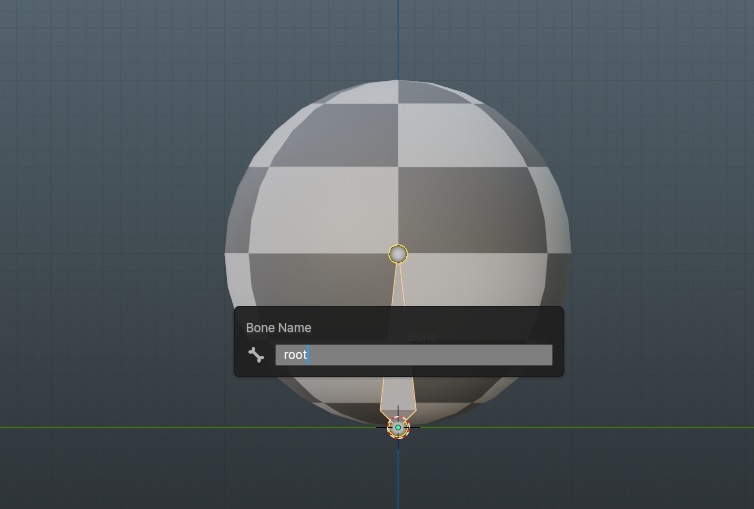
In Edit Mode, select the Head and use SHIFT+S to opt for Selection to Cursor. Next, move the head with G. To move it preciesly, click Y, to lock the movement in Y axis. After that, before confirming the transform, hit 1 to move it by 1m in the selected axis.
To familiarize with the two key functions of the 3D Cursor, let’s change the mesh’s origin. To do that, move the cursor with 3D Cursor to Active function using SHIFT+S shortcut. In order to do that, hit TABto get back to Object Mode.
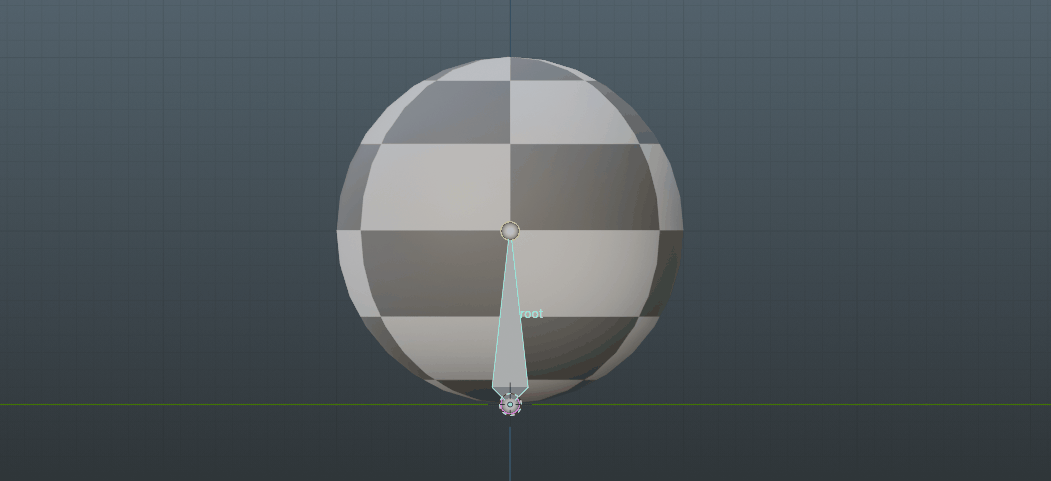
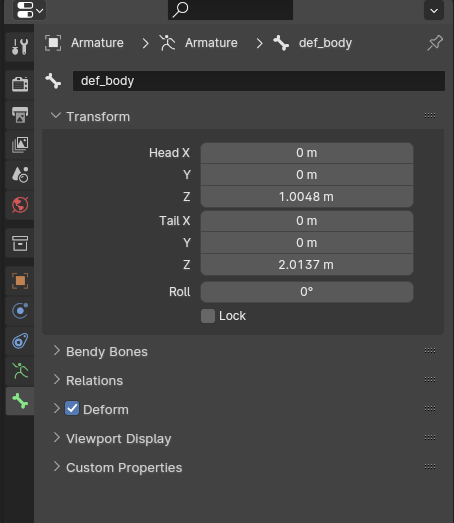
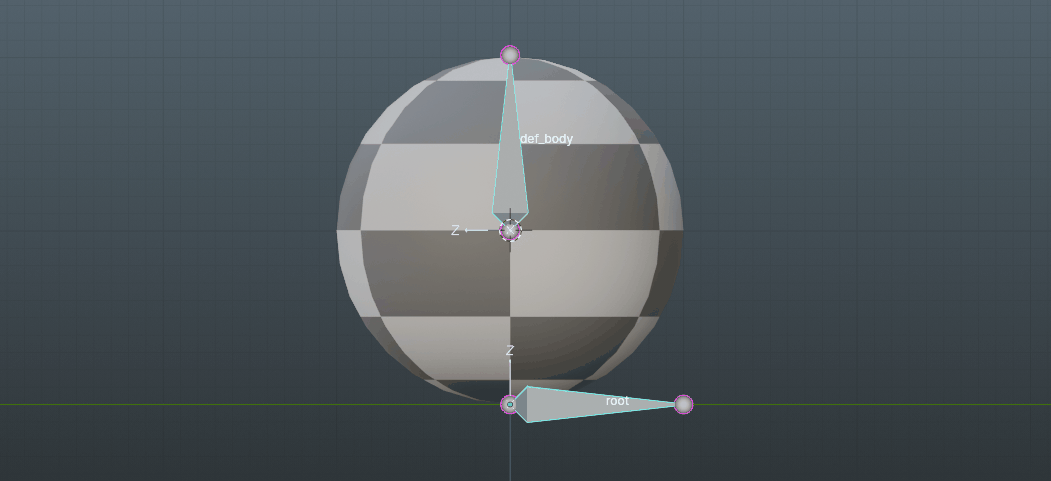
Once that is complete, in next step we’re going to create our only def bone, that we will name def_body. To achieve this, select the armature, switch to Edit Mode and select the root bone’s Tail. Extrude a bone by pressing E and then lock it in Z axis with Z. Extrude it approximately to the middle of the ball and rename the bone with F2.
Clean outliner is your friend - rename things as early as possible to de-clutter the project!
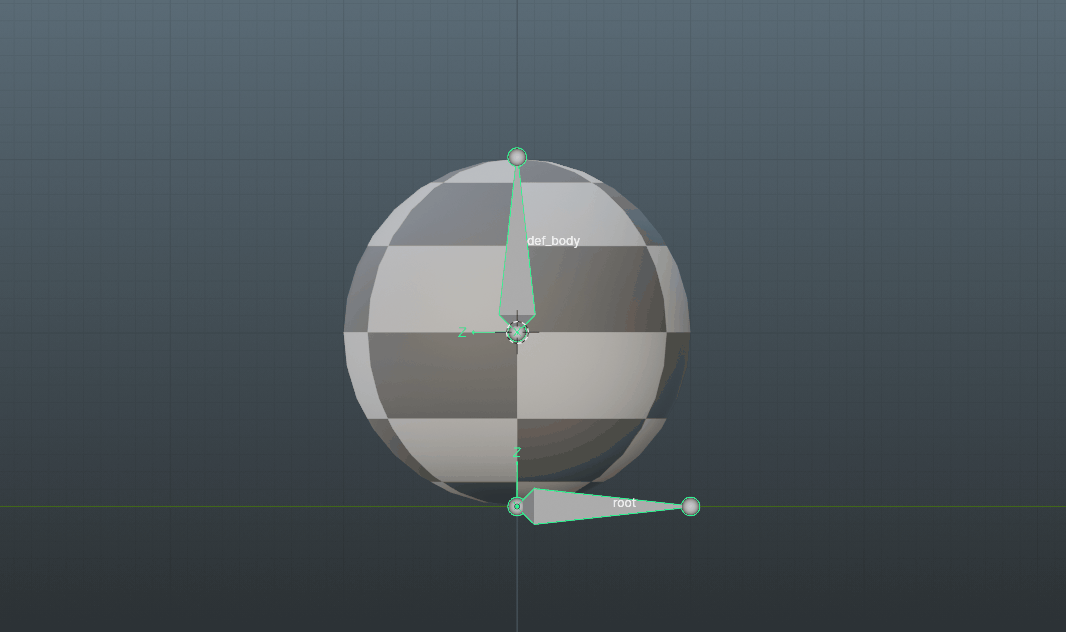
Following that, we will move the def_body bone in Z axis by using 3D Cursor. Make sure that this bone is not parented by using ALT+P>Clear Parent. Use SHIFT+S and select Selection to Cursor. Your rig should look like this:

One crucial step for later is to modify the rotation mode. In Pose Mode, select your bones, and hit CTRL+R. From the dropdown menu select XYZ. It’ll become important later!

Next, we proceed to bind the mesh to the bone in a process called skinning.
Let’s begin by examining each bone in the Bone Data tab in Properties Menu. Make sure that [] Deform checkbox is selected. For the root, leave this unchecked.
In blender, bones with the prefix DEF are the only ones that should have deform checked, by doing that you’ll know which bones influence your mesh. Besides that, deformation bones are the only ones that are going to be exported into the engine.
Once you’ve confirmed that only your deformation bones are actually deforming (and it’s indeed a good habit to check them before initiating the skinning process), let’s start skinning!.
Return to Object Mode, select your mesh, then while holding SHIFT, select your Armature. To bind them, hit CTRL+P and choose Armature Deform - Automatic Weights from the dropdown menu.
Following this, let’s chek if our skinning process worked properly. Select the Armature, then in Pose Mode, move root, and then def_body bones to check if the rig works properly. Note: You can quickly reset transformations by pressing ALT+R for rotation, ALT+G for translation and ALT+S for scale.
With that, we’ve completed the first phase of creating the ball rig in blender. As a next step, go ahead and parent the def_body to the root with an offset. Here’s a quick guide in case you’re unsure:
Click to reveal
Go to Edit Mode
Select def_body, then SHIFT-click root bone
Use CTRL+P -> Parent With Offset
3. Making Squash & Stretch mechanism#
As we’ve discussed the mathematics behind achieving an optimal squash & stretch ratio, blender offers a pre-built constraint that can handle the task for us. While it has advantages, I personally lean towards rigging nodes of Maya.
The constraint I’m talking about is Stretch To that looks like this:

As I am not a fan of explaining perfectly written documentation, here’s the link to Stretch To Constraint. Now, let’s focus on the key aspects:
- Target - it’ll be the the “end point” of our squash & stretch target
- Maintain Volume - it determines which axes should be affected to preserve the virtual volume stretching along Y axis.
Let’s return to our rig and start creating our stretch mechanism. To begin, duplicate our def_body bone, then select the tail. Next, reset the 3D Cursor with SHIFT+S>3D Cursor To World Origin. You might have some problems selecting the right Tail, so to help with that, let’s look into the concept of Bone Collections.
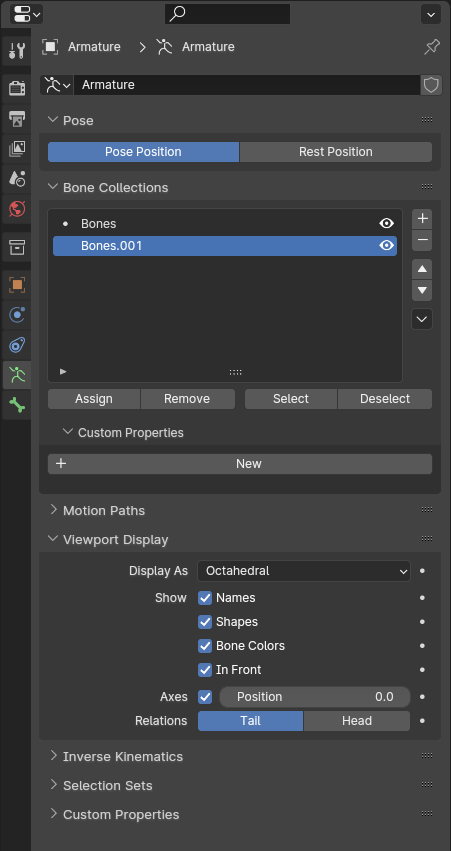
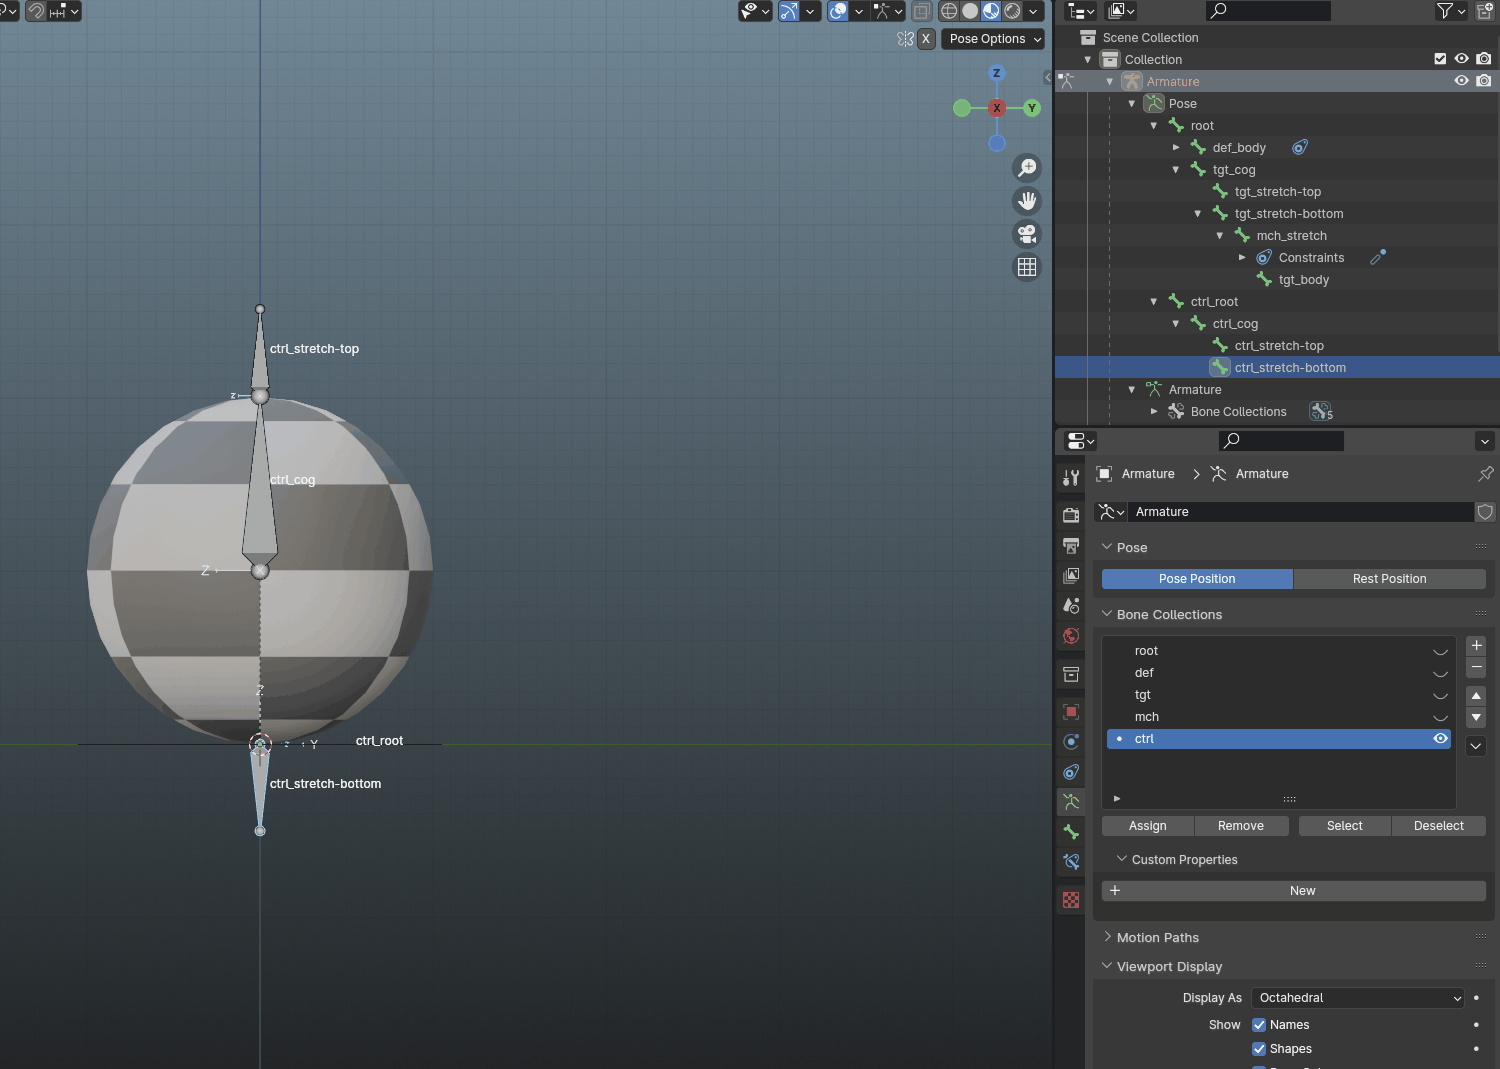
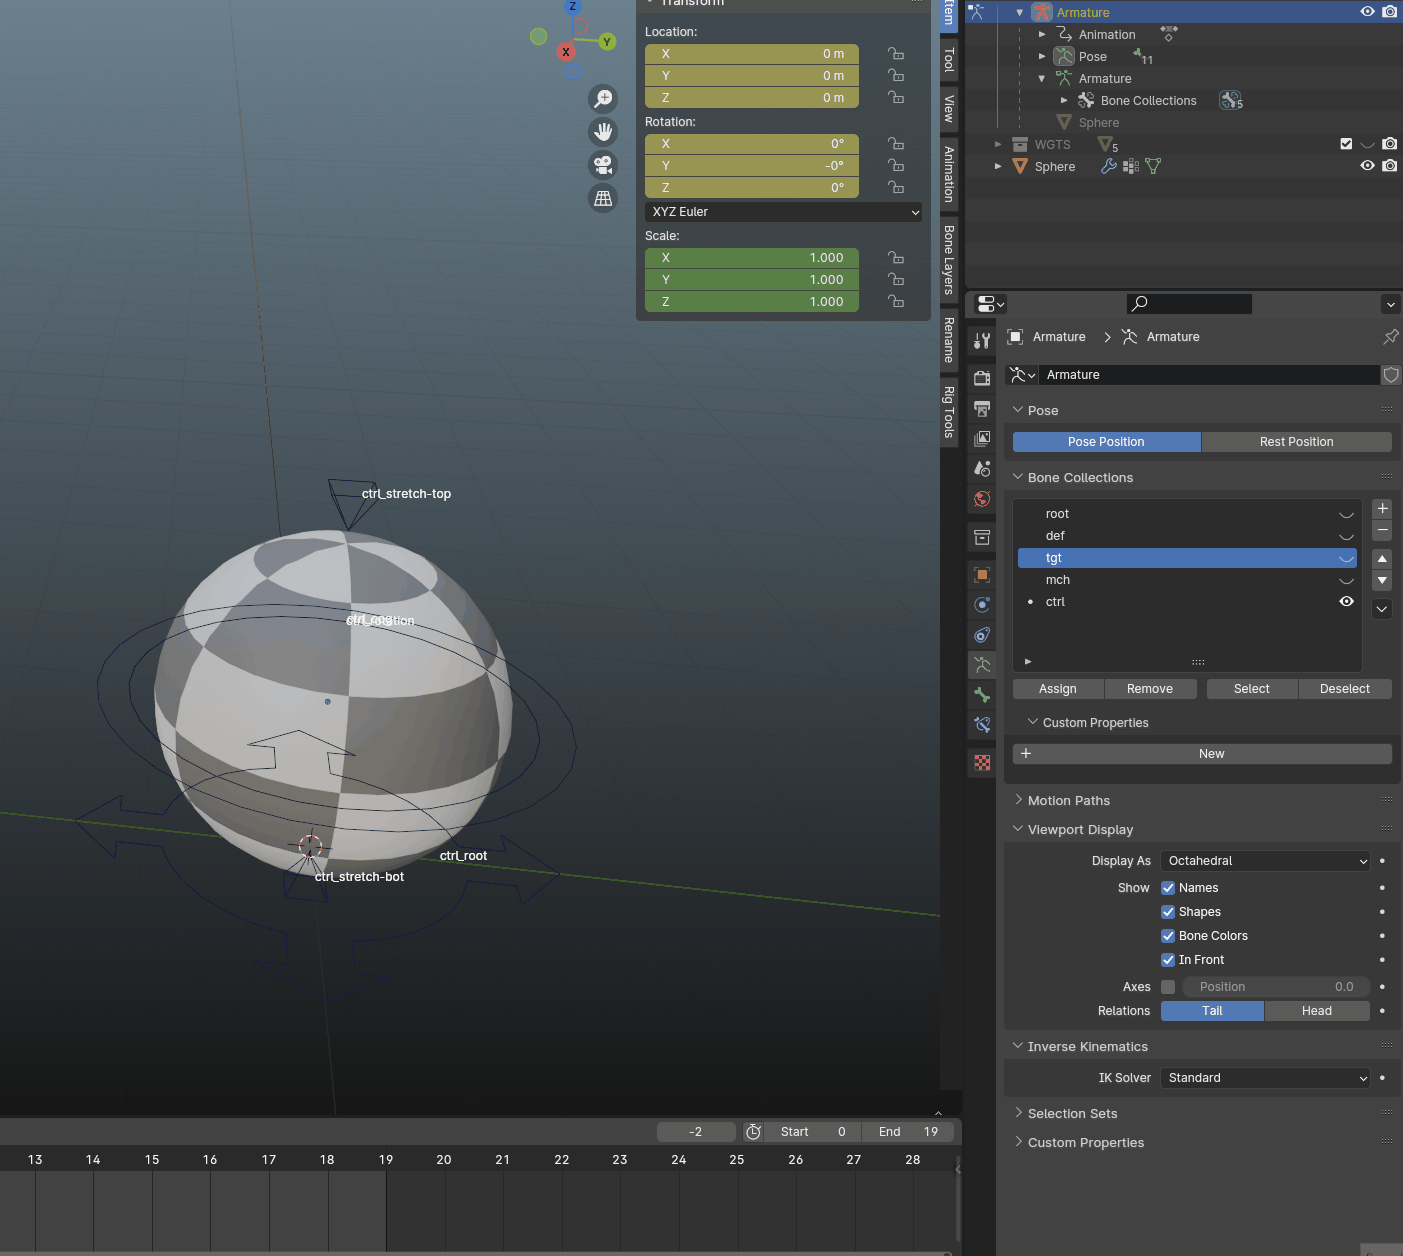
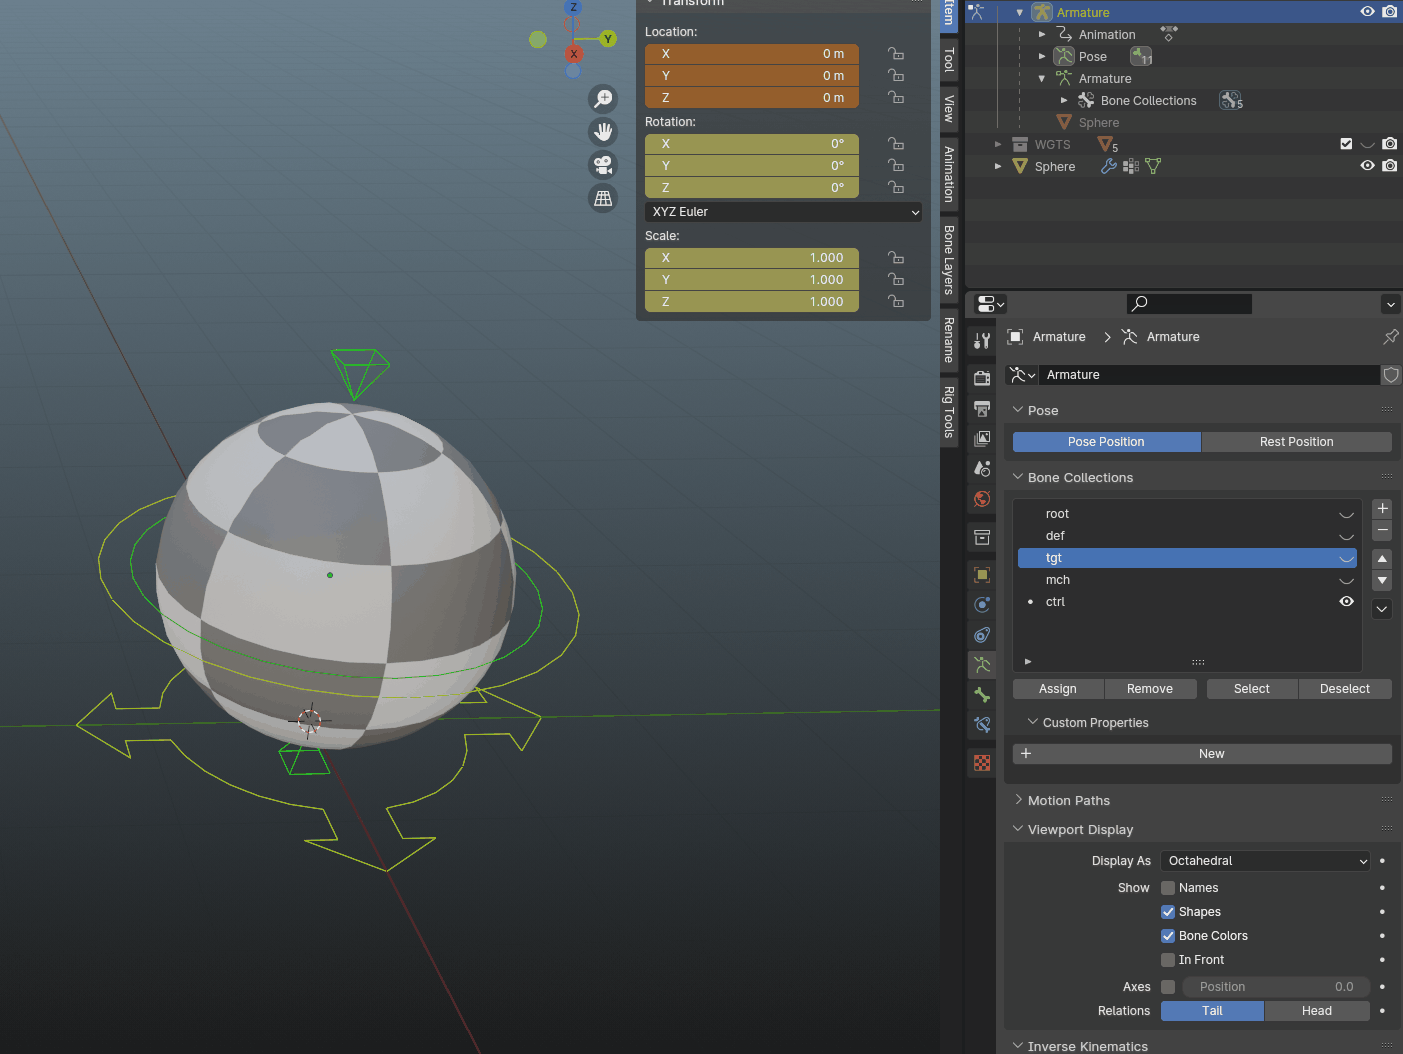
Consider Bone Collections as akin to layers in other software applications. Since blender 4.0 update, old layer system was revamped to make them unlimited (we had 16 normal + 16 protected before). By utilizing the “+” button, we can add several layers and configure them to appear like this:
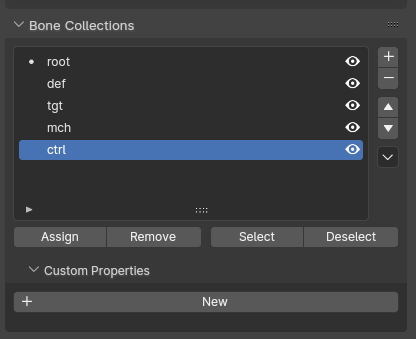
The critical aspect to grasp is that if a bone has a dot near the name of the collection when selected, then it’s a part of that collection. Consequently, we can hide or unhide them as needed, although they can be in more than one collection. However, it’s essential to remember: you cannot parent or unparent bones that are actively hidden!
Let’s sort the bones by their names:
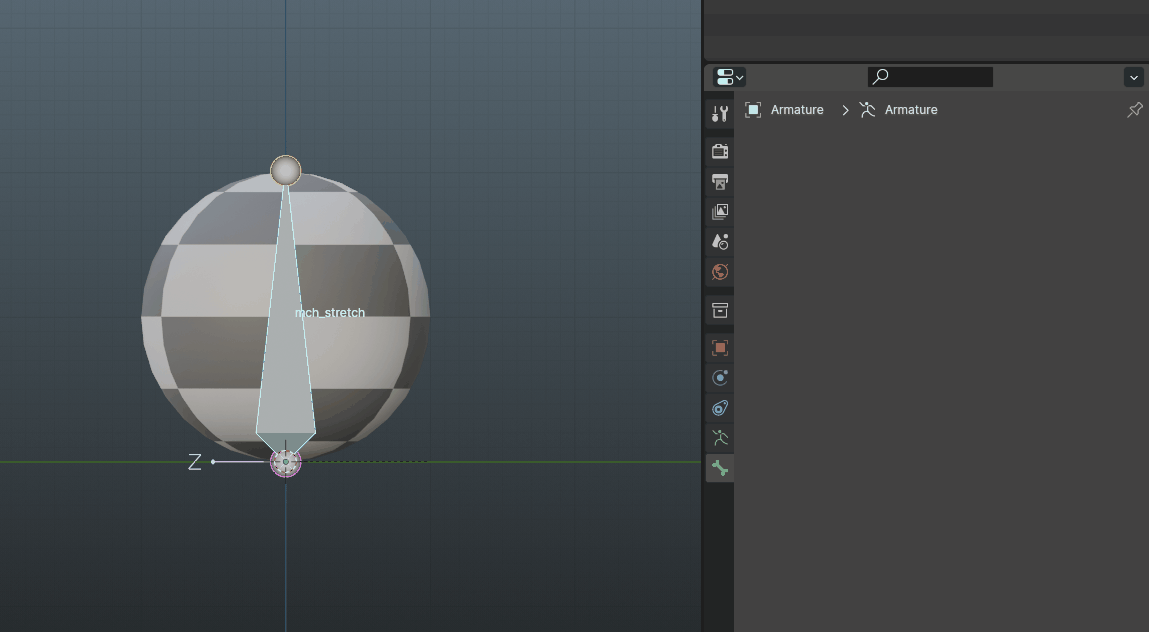
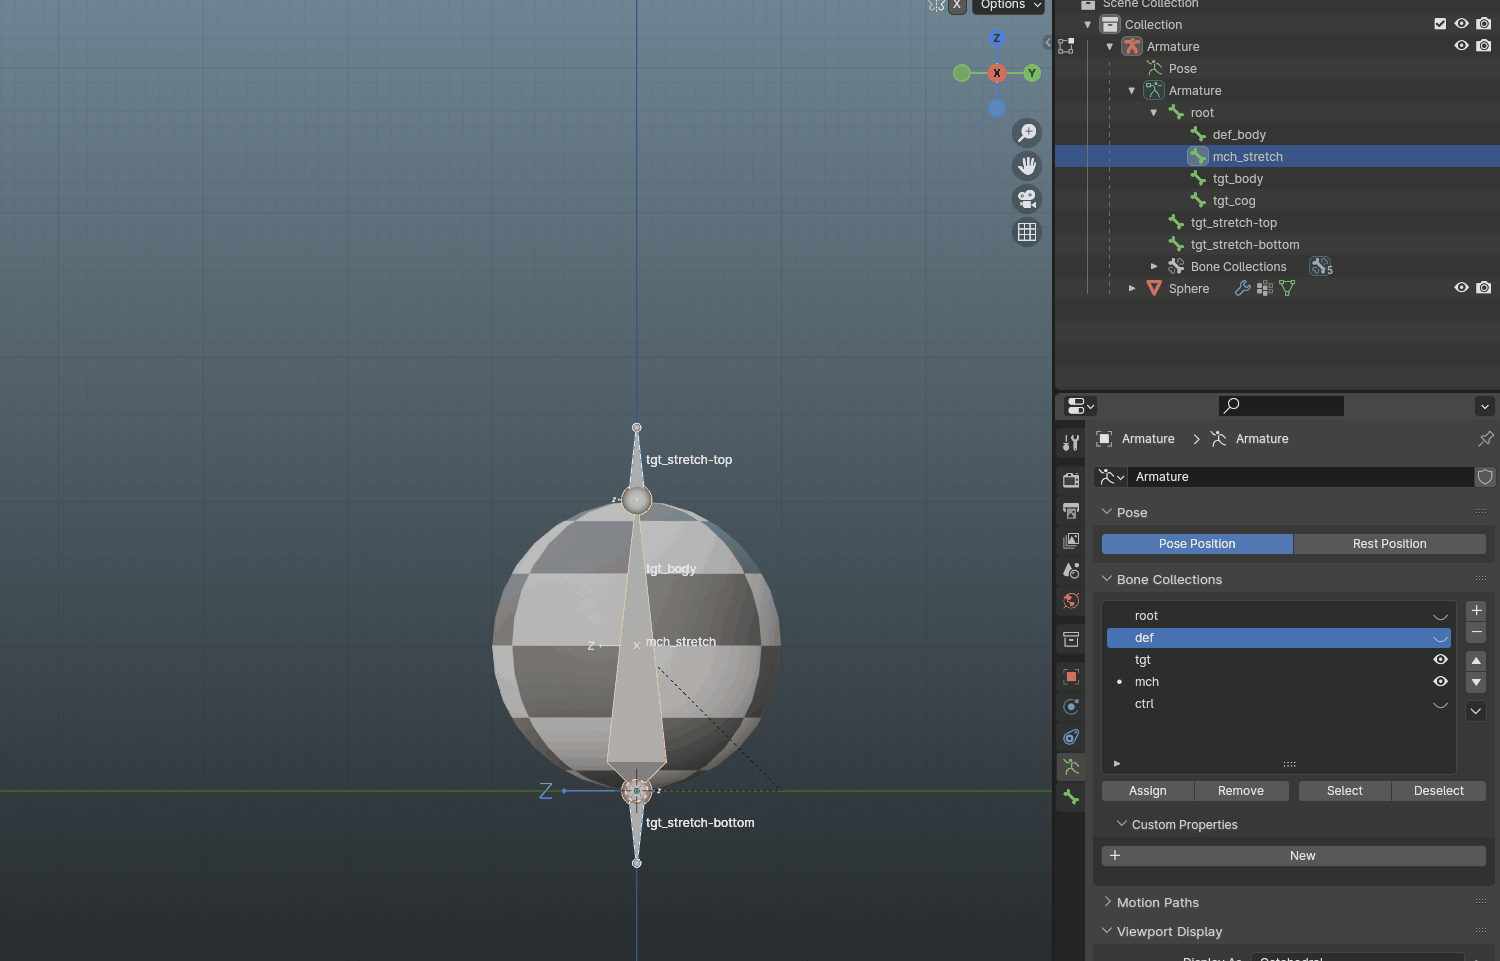
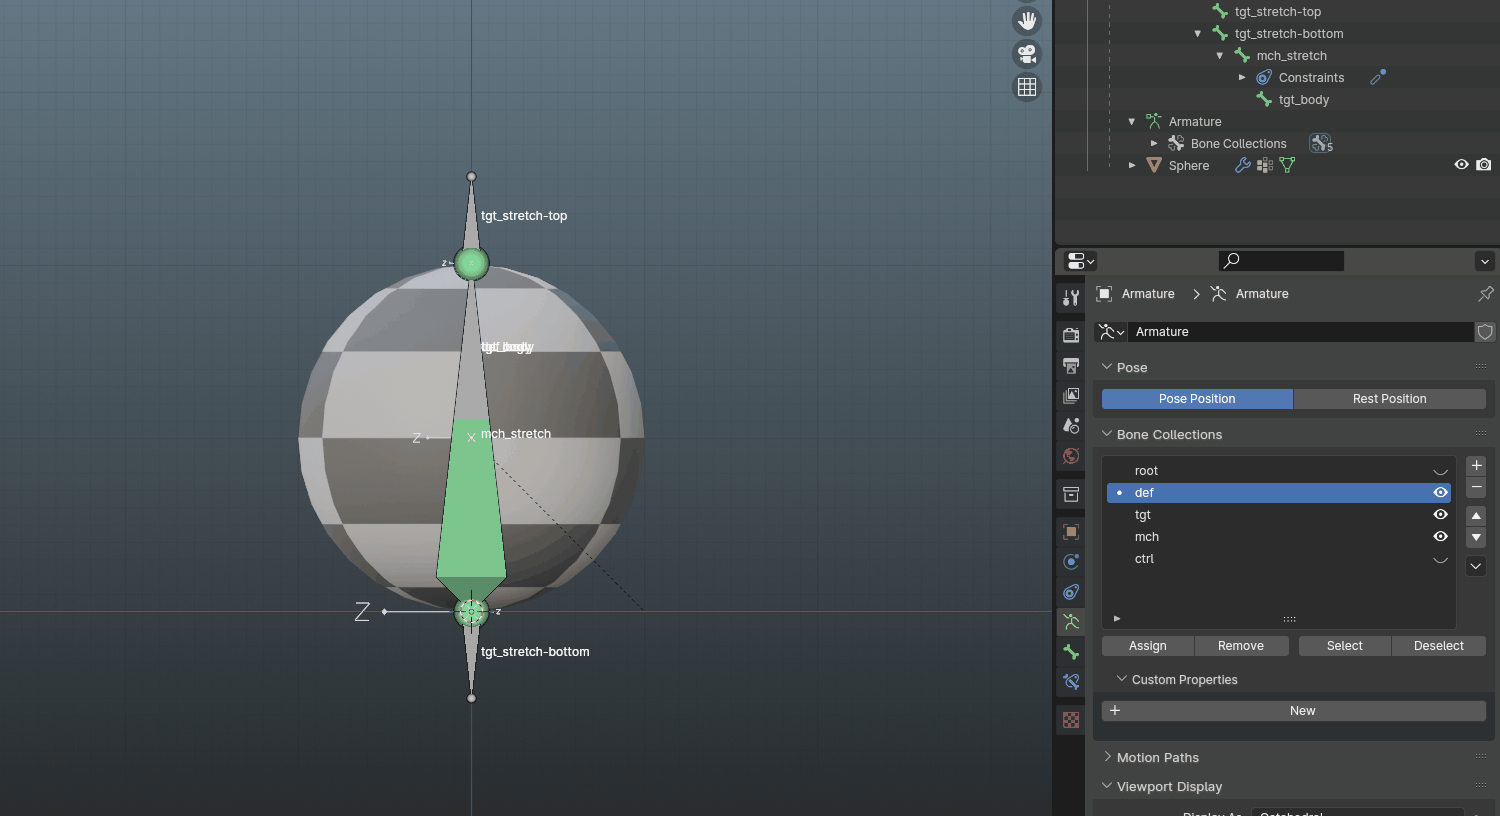
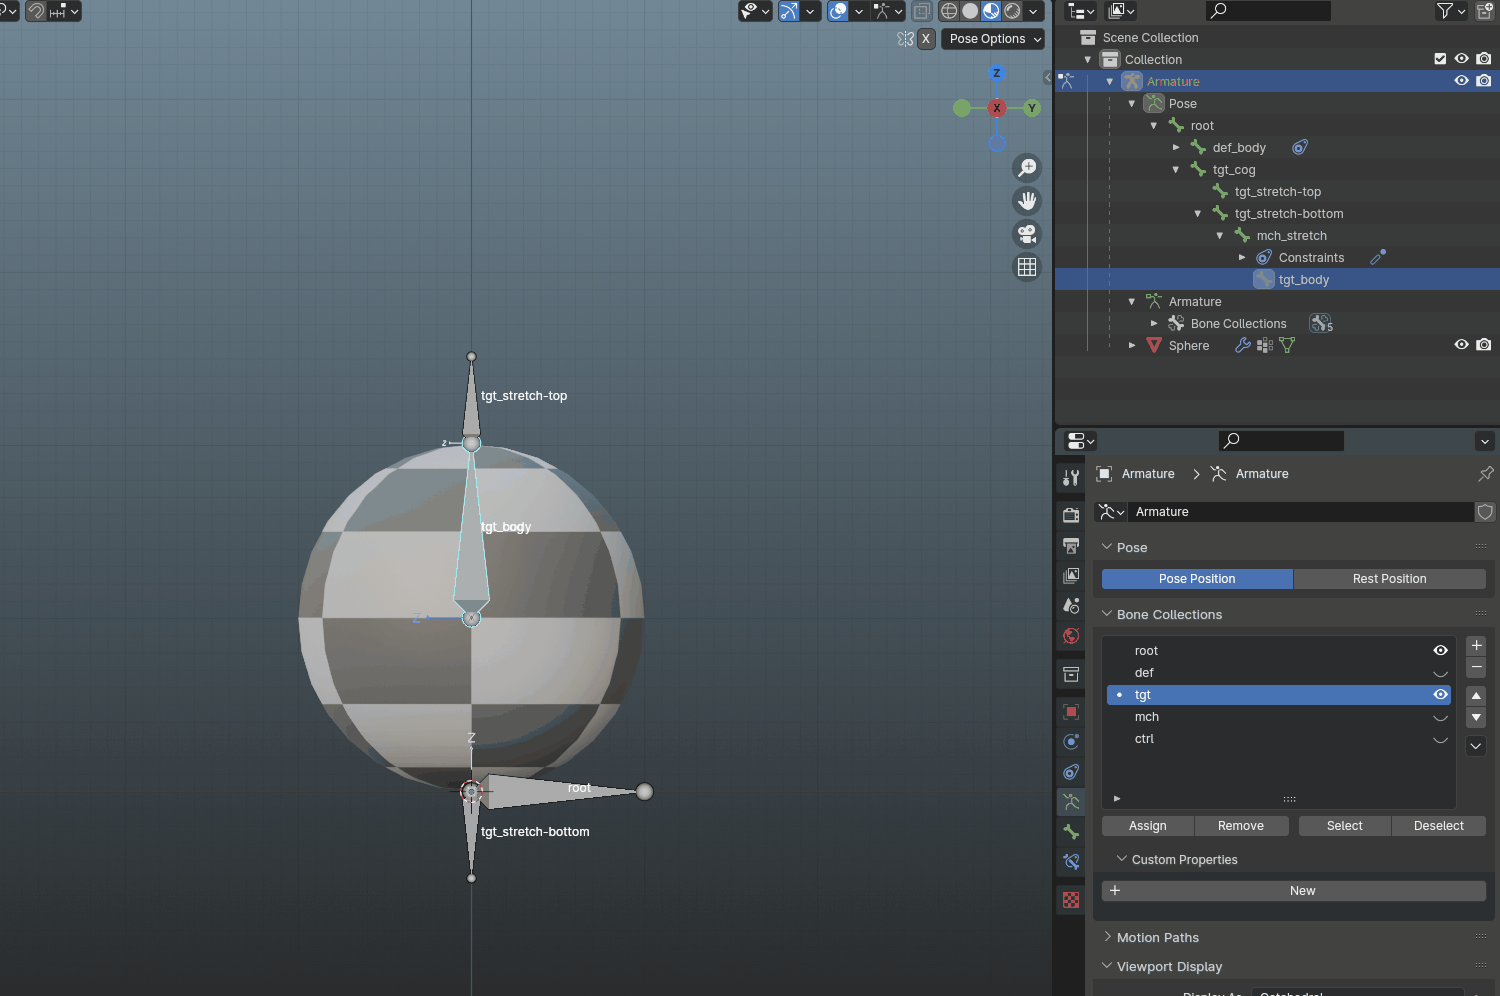
Having set up the Bone Collections, we can now proceed to create the mch_stretch bone. Let’s follow the sequence again: duplicate the def_body bone with SHIFT+D, select the tail and use SHIFT+S>3D Cursor To World Origin. It should snap the bone to the bottom of the ball making the newly created bone go through whole height.

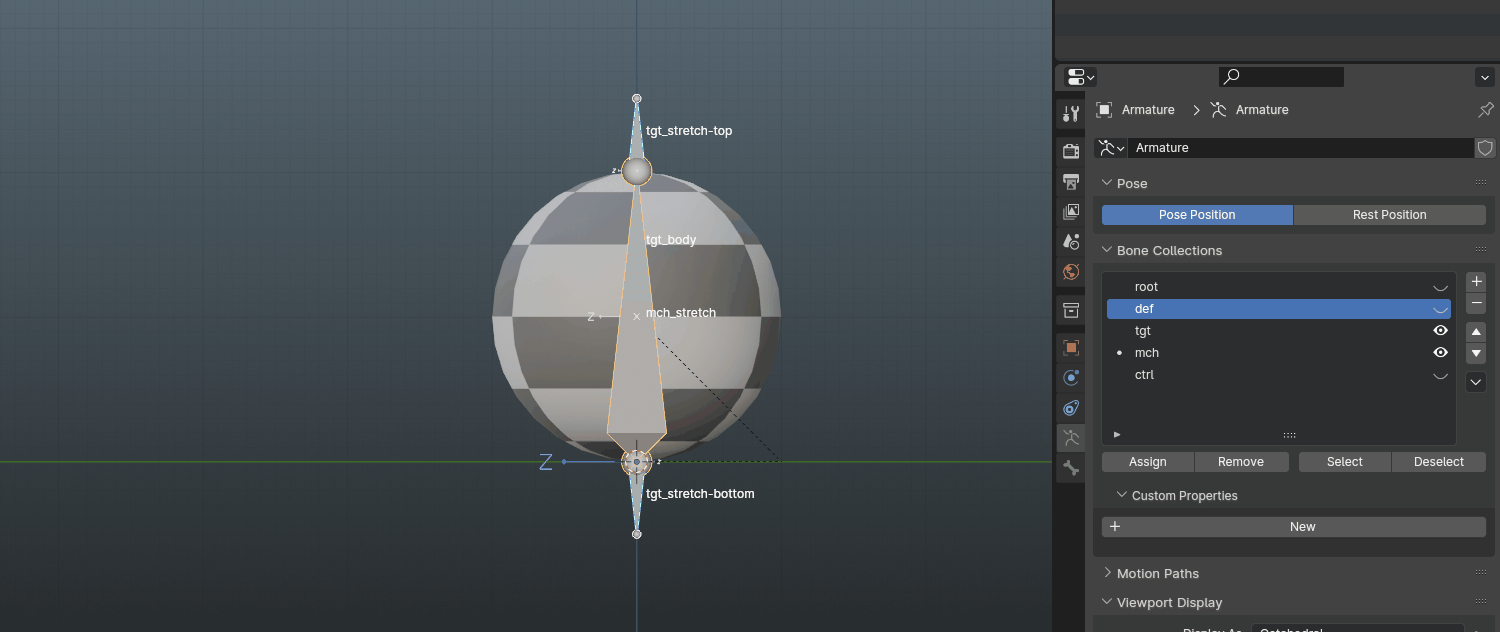
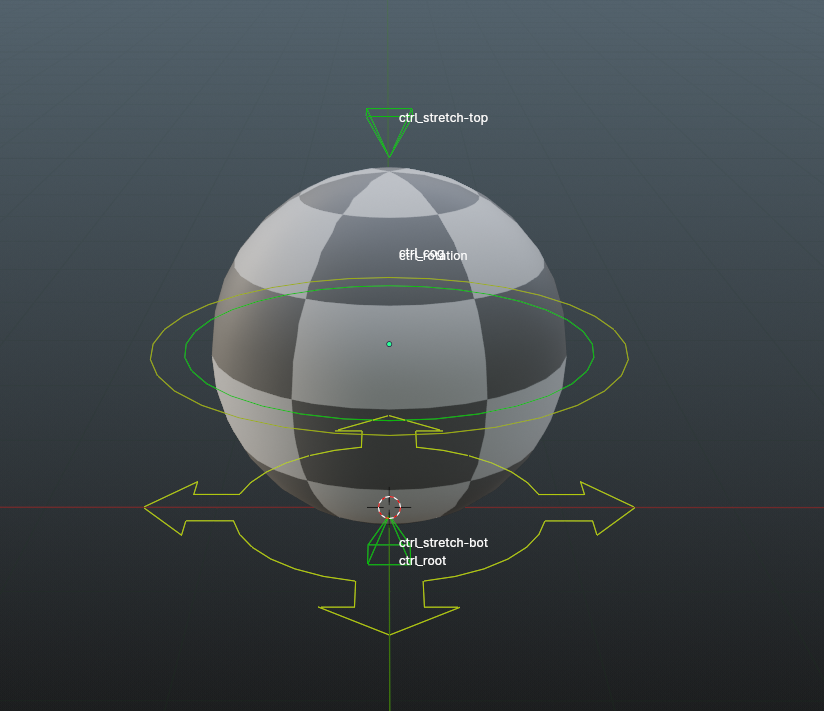
Taking a glance at our control list, it’s evident that we need some additional controls to manage the stretch from both sides. For this purpose, we’ll create two additional bones. To maintain a clean rigging structure, we will utilize target bones. They will separate constraints between the deformation skeleton (def) and our controls (ctrl) by having an intermediary target (tgt) skeleton. Think of it as something akin to Maya’s offset groups, used to ensure that controllers are always at transform (0, 0, 0). As always - we’re building habits that will enhance our rigging skills in the future.
Let’s proceed by extruding two bones on the Z-axis in Edit Mode, one from the bottom and one from the top of the mch_stretch. We’ll name them tgt_stretch-top and tgt_stretch-bottom, then hit ALT+P>Clear Parent We are going to extrude two bones on Z axis, one from bottom and one from top of the mch_stretch, we’re also going to name them tgt_stretch-top and tgt_stretch-bottom and Clear Parent to let them move independently.
For the next step, I’ll leave you with some exercises. In the next step, we’ll assign appropriate bone collections and create a tgt_body that will be a copy of def_body. Ensure to uncheck the deform option! Additionally, duplicate tgt_body once more and name it tgt_cog.
Once completed, our hierarchy should resemble the following:
root
    def_body
    mch_stretch
    tgt_stretch-top
    tgt_stretch-bottom
    tgt_cog
    tgt_body
Now, to explain how this ball’s mechanism will work, we are going to do two things:
- Add stretchTo to mch_stretch
- parent things properly
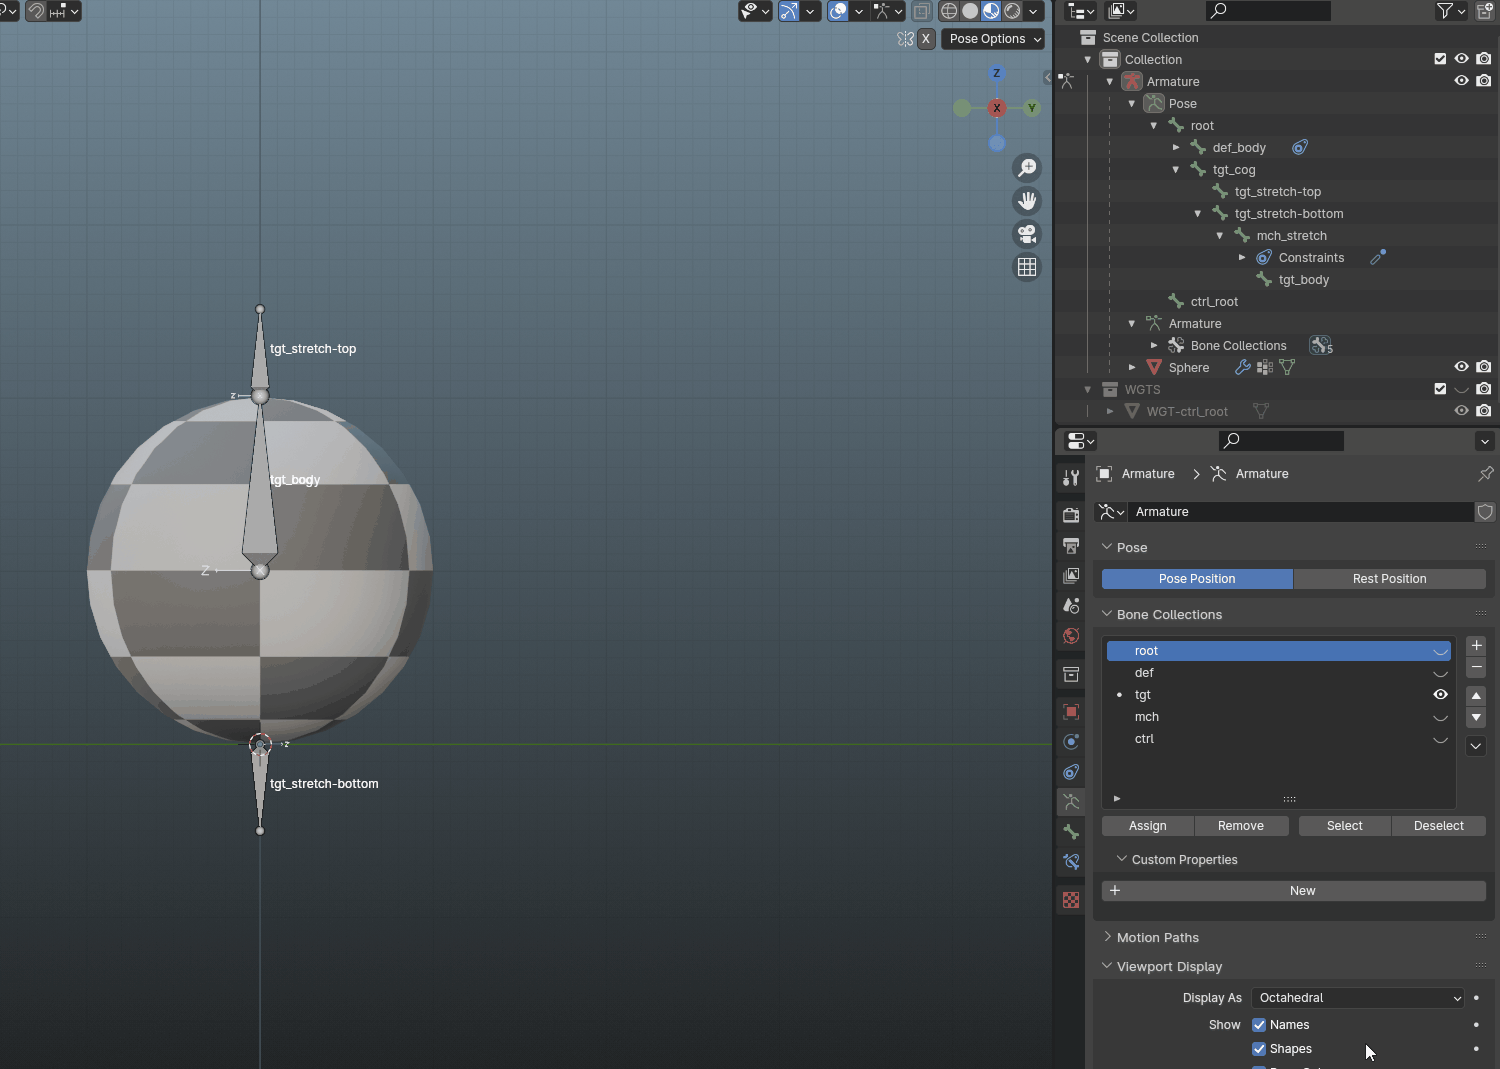
Before delving into the why behind this setup, let’s add constraints. Switch to Pose Mode and add constraints either by using SHIFT+CTRL+C or through Properties>Bone Constraints. Set Armature as the target and tgt_stretch-top (or bottom) as the bone target. After this, check if it functions as intended.
Following the constraint addition, let’s parent our mechanism properly. Let’s re-think what we need:
- First, we want to be able to move everythign by tgt_cog, making it the top of the hierarchy.
- Second, our stretch controllers should follow the cog, so they’re going to be children of tgt_cog.
- For mch_stretch to work in both directions we can make it a child of tgt_stretch-bottom - as bottom and top are on the same level in hierarchy, they’ll be independent, so this setup will let us use stretchTo from bottom to tgt_stretch-top and move the stretcher mechanism by moving the bottom while top will stay in place.
- To maintain independent rotation from the stretch, it should happen “under” the stretching hierarchy. Therefore, make the rotation occur afterward by making it a child of mch_stretch.
This results in a hierarchy like this:
root
    def_body
    tgt_cog
        tgt_stretch-top
        tgt_stretch-bottom
            mch_stretch
                tgt_body
4. Controls#
Even though besides rigging I am also an animator, I always plan my controls like I’d be rigging for someone else - that’s part of my design experience legacy. That’s why, we’ll tackle planning the controls like we would plan user experience.
While rigging, one should aim to create systems that are easy to understand and as hard to break as possible. That’s why normally you’d want to layer things in a way, that is possible to fiddle with for people with more technical knowledge, but not too simple to break too easy. For example - looking at antCGI’s way of setting up projects in Maya, I really love creating stuff that are DO_NOT_TOUCH to properly mention what parts are going to break the whole rig.
As blender outliner collections work differently than Maya ones, we achieved some kind of this grouping with target bones. That’s why we are going to create a set on controls on top, so animators won’t have to work withing specific system of bones and give them more quality-of-life selecting.
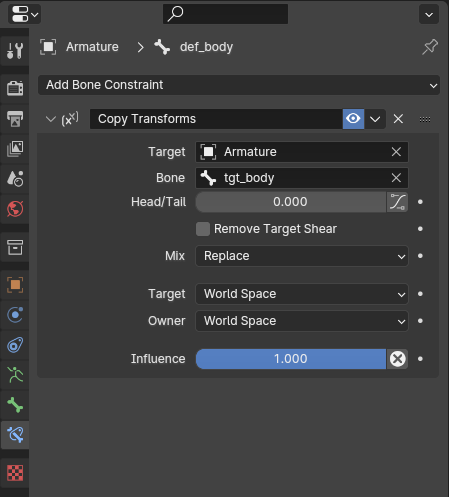
TO kick things off, our initial step is going to make deformation bones follow our target skeleton. Since we’re dealing with just one deformation bone, it’ll be straightforward. That’s why I want you to do it yourself!.
The goal is to add a Copy Transforms constraint to def_body and select tgt_body as the target. You can use either bone properties, or go to Pose Mode and use SHIFT+CTRL+C shortcut. To remember it easy: you always add the constraint to the last bone you’ve selected.
Now, let’s check if every target bone works properly.
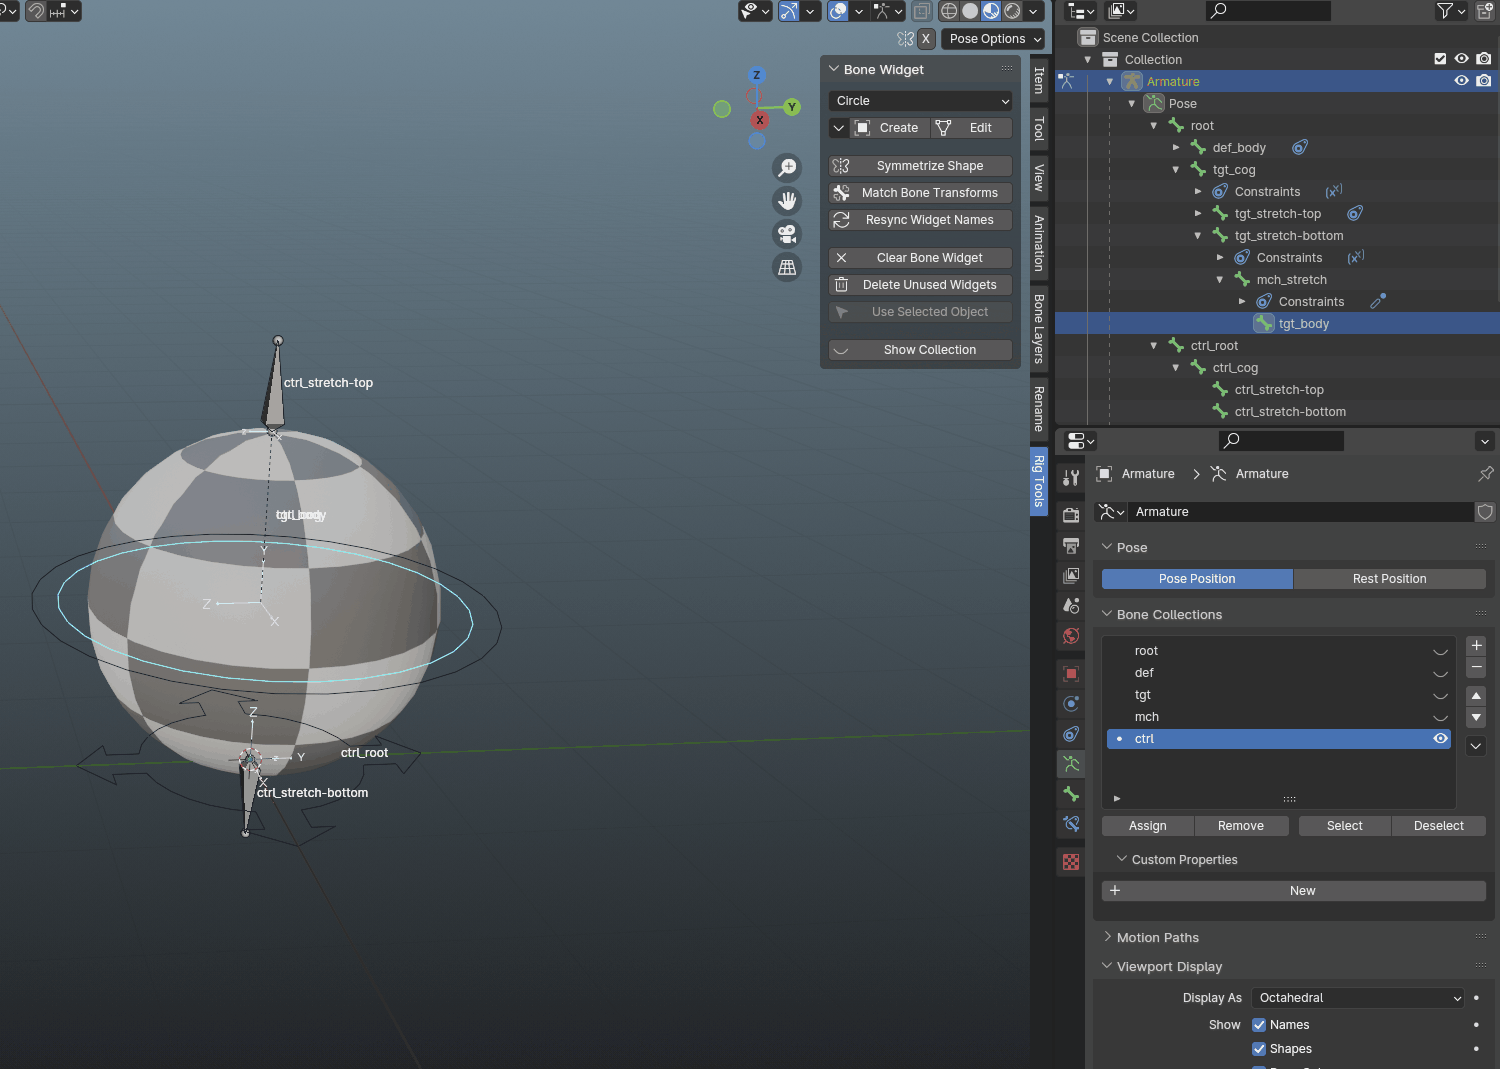
If everything works, let’s dive into setting up some cool looking controls! Grab Bone Widget before we get started.
First off, we’re going to talk about different types of controls and shapes one might associate with specific bone names. If we look at the hierarchy, at the top we have a root. If you didn’t know, blender actually creates root everytime - it’s actually the Armature itself - that’s why technically you could export your skeleton without root, but 2-level root is a standard in rigging these days. It gives more control and is used in some techniques, that I might touch in the future. For us the most important thing to understand is that the root bone mimics in-engine capsule.
Let’s explore some popular shapes:

I’m sure you’ve come across a variety of them - circular, sometimes squared, with or without arrows. In Bone Widget, we’ve got the choice of two options (named Root 1 and Root 2), and for the Vayne-styled look (my preferable), let’s go with Root 1.
To start, duplicate a bone of root and give it the name ctrl_root. Don’t forget to clean things up within the Bone Layers. Since our controls will mirror the target bone hierarchy, you can safely leave it hanging out under Armature without any worries.
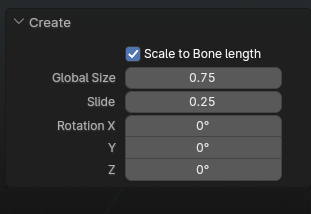
Moving on, let’s switch over to Pose Mode and hit N, to pop open the sidebar. Navigate to Rig Tools and open up Bone Widget. Next, Select Root 1 as the shape and click Create to change the bone’s shape.
Once you’ve nailed that, here’s a straightforward exercise for you: duplicate all the target bones and rename them as ctrl_*, where * represents the relative name. Skip copying the mch bone, because mechanisms aren’t controls.
After this, set up the parenting to mimic the target bone hierarchy.
Now, here’s the trick I’ve been hinting at: do not duplicate tgt_body. Instead, we’ll make it a control (so you can add it to ctrl collection). This step is crucial to avoid rotation glitches.
Now, we need our target bones to follow controls, so let’s add copy transform from controls to targets. This time, we’re going to do it faster - by SHIFT clicking first ctrl, then tgt bone and using the same shortcut as with the deformation bone - SHIFT+CTRL+C.
Let’s brainstorm about our other controls - beginning with ctrl_cog and tgt_body. A standard cog (sometimes referred to as hips) is usually a big circle around “hips” area. We’ll roll with it, also creating a smaller circle for the rotation purposes. When you add a shape, keep in mind that you can tweak its dimensions by hitting the Edit button, allowing you to resize the controls.
When it comes to stretching controls, their design can vary from one rig to another. However, for our rig, let’s categorize them as auxiliary controls. This implies that we need to create a shape that conveys the purpose behind its function, enabling animators to grasp how to manipulate the controller as naturally as possible. Think of control design as a form of UX of rigging techniques - incorporating markers that, through form, shape, or color, subtly guide users on how to interact with our rigs. If you’re interested in delving deeper into the concept of markers in design, Donald Norman’s The Design of Everyday Things is a great resource.
As my choice for markers, I’ve settled on pyramids. Their pointy side naturally guides the eye towards the ball, creating an intuitive sense that translating the controller towards the inside will produce a certain effect, probably toward the center of the ball. Now that we’ve looked into my process, feel free to add them yourself. By the end, your setup should look similar to this:
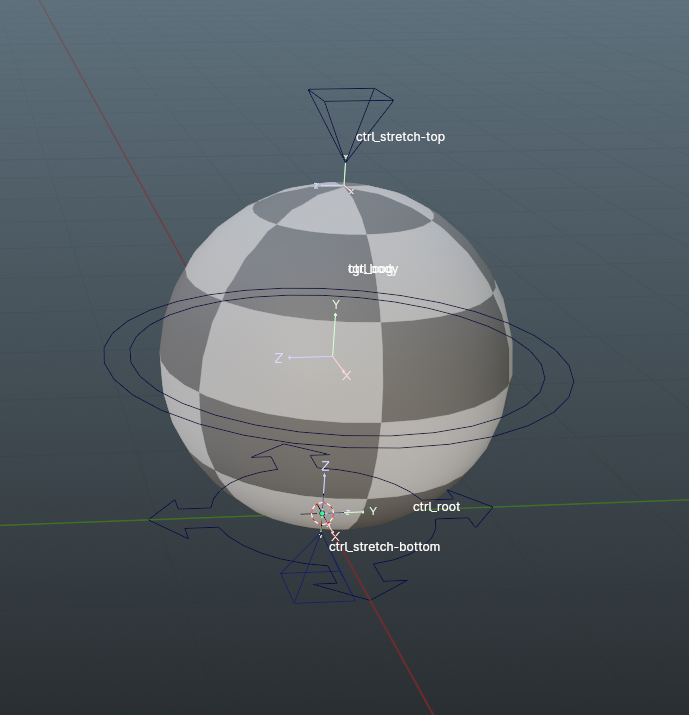
As you can observe, my pyamids are a bit smaller and shifter outwards. You can achieve this effect either by utilizing the Edit option or by accessing the menu that appears in the bottom-left corner. Experiment with these features to fine-tune the size and positioning to match your design!
After gaining experience with enough rigs, you’ll likely notice that colors in rigging tend to follow similar patterns, regardless of the author. I’ve developed my own control scheme, which I’m excited to share with you:
- Left side controls are RED
- Right side controls are BLUE
- Middle side controls are YELLOW
- Auxilary controls are GREEN
To change the control colors, navigate to Bone>Viewport Display in Properties tab. I typically opt for a custom color theme, utilizing the adjacent button to copy the color scheme to other colors (with the source object being the LAST selected).
Give it a shot by selecting ctrl_stretch-top, navigating to it’s Viewport Display tab and adding a custom color theme with a vibrant green shade. Once set, select the remaining auxiliary controls and hit the double arrow button to match these colors.
Since you’re now adept at adding control colors, let’s bring this to a close by adding them into the remaining controllers. Your final result should resemble this:
5. Clean up & final touches#
Now that we’ve build everything, you might be tempted to dive straight into animation.
Hold on!
Remember, I mentioned that a mess can be a real headache later, so let’s wrap up with some final cleanup.
We’ll start with Armature Tab - we can finally check off Names, In Front and Axes tab - animators don’t really need them and if they need to have controls in front, they’ll set them up.
Before we conclude, let’s address one more crucial aspect: locking certain transforms. Althoguh I’m usually in favor of providing animators with flexibility (of not locking their transforms), there are instances where a bit of guidance can enhance their animation experience.
Let’s begin with the stretch controllers. While animators can manipulate these with transform (location), rotation and scale are only going to make the controls spin/scale without any influence over the rig - to streamline usage, we can lock these transforms, allowing animators to control the squashing effortlessly by simply pressing G.
The last thing we should think about is locking up some transforms - I am generally against limiting animators choices, but there are some things we can do, to help animators in their work.
After this, let’s consider the rotation control. We don’t really need the scale, so it should be locked. Rotation is the primary focus, so that should remain open. What about location? There are two schools of thought on this. Some prefer locking it out since the control isn’t meant for translation. However, as stated earlier, I believe it’s better to leave it open. Animators can discern if they’ve added a keyframe to the wrong controller and rectify it themselves. Moreover, they might need to detach the translation to two different bones, and this setup facilitates that. Keep in mind that leaving the location unlocked might affect some squash transforms (if you really try to break the setup) - ultimately the decision is yours.
Moving onto the cog, as the main control for moving the mesh, both location and rotation should be open. However, for the scale, I suggest locking it to prevent potential bugs.
Finally - the root control - certaintly, location and rotation should be unlocked. Regarding scale, with our setup of maintaining a consistent hierarchy, users can easily scale the root to achieve different sizes easily. Controls will scale proportionally, ensuring the rig functions seamlessly. However, scalability isn’t always straightforward in rigging and careful consideration is needed when designing controls.
6. Closing Thoughts#
Congratulations on successfully rigging your first ball! Now, you can embark on your animation journey, starting with bouncing ball exercises. Additionally, you’ve gained insights into planning controls and naming conventions, which will prove invaluable in your future endeavors.
If you’re as excited as I am, I won’t keep you any longer. After mastering the ball, the animation world is yours to explore!
Happy animating!
And if you choose to share you ball animation, tag me (@arahfx) - I’d love to see your creations!